
In this part, you'll learn how to transform your generated design into a structured, maintainable website using AI as your coding partner.
Up to this point, you've created a beautiful static HTML page using DeepSite. Now it's time to turn that into a proper web application using modern development tools and AI assistance.
🧰 Choosing Your Tech Stack
Before diving in, you'll need to pick a tech stack — which simply means the combination of technologies you'll use to build your website.
In the previous part, you used DeepSite to create your first landing page, which already included TailwindCSS and some vanilla JavaScript.
Why not just stick with vanilla JavaScript?
Vanilla JavaScript (i.e., plain JavaScript without a framework) works great for adding simple user interactions, animations, and maintaining user state in the browser. However, as your website grows, it becomes hard to maintain and scale.
That's why most developers use frontend frameworks like React, Vue, or Svelte — which provide structure, make it easier to manage growing complexity, and work better with modern development tools.
Here are my recommendations:
SvelteKit: for frontend framework
Tailwind: for CSS styling
PostgreSQL: for database (when needed later)
You can also ask ChatGPT for comparisons of other stacks or refer to this excellent Medium article for more details.
Why SvelteKit?
But here's why I personally recommend SvelteKit:
1. Beginner-friendly yet powerful
SvelteKit is full-stack out of the box — it handles routing, server-side rendering (SSR), and builds a performant website without much setup.
2. Fast and lightweight
SvelteKit compiles into highly-optimized vanilla JavaScript, which avoids the runtime overhead of virtual DOM used by React or Vue. This means faster load times, better SEO, and improved accessibility.
3. Better AI experience
SvelteKit is newer and has a simpler ecosystem. That means AI tools are less likely to generate outdated or incompatible code compared to React or Vue, which have a longer, messier history of versioned APIs.
💡 Personal Experience
When I first tried using AI to generate React code, I often had to fix mismatched libraries or deprecated APIs. With SvelteKit, I had a much smoother experience — and I could focus on building rather than debugging.
🖥️ Setting Up Your Environment
Make sure you have these tools installed on your computer:
- Node.js (to run JavaScript outside the browser)
- Git (for version control — optional, but highly recommended)
Create a SvelteKit project
Open a terminal (PowerShell on Windows, Terminal or Bash on macOS/Linux) and navigate to the folder where you want your project. Then run:
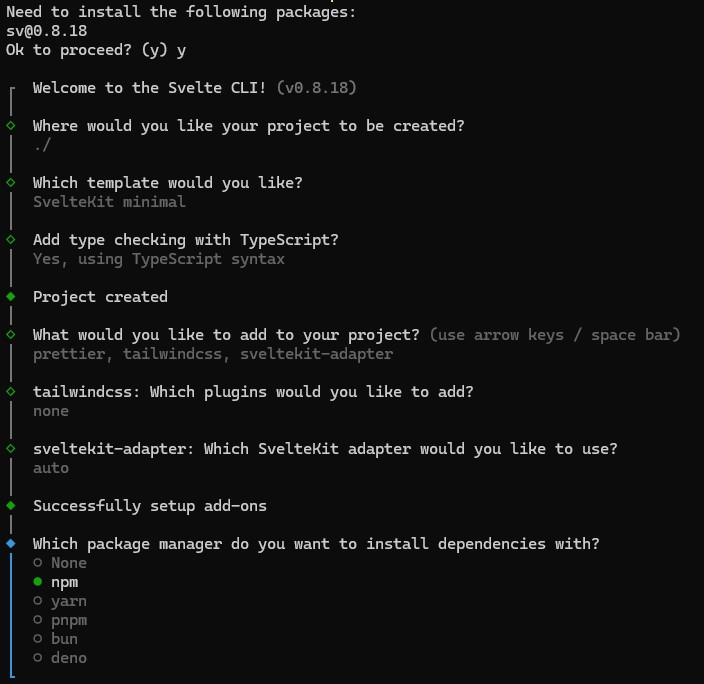
npx sv create my-appThis uses the new Svelte CLI to scaffold your project. (Note: older guides may tell you to use npm init svelte@next, but sv is the newer and simpler way.)
Follow the prompts — don't worry too much about advanced options right now.
📝 Example of selected options
Now open your new project folder in Visual Studio Code or Cursor. This is also a good time to create a free Cursor account to enjoy its 2-week premium trial.
Here is a complete document of going through this command: https://svelte.dev/blog/sv-the-svelte-cli
🗂️ Moving Your Generated Design
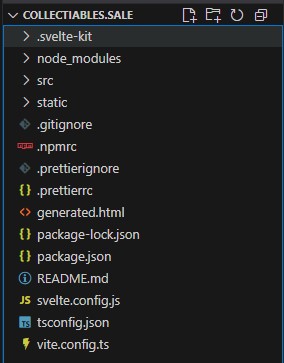
Take the generated.html file you created in the previous part with DeepSite and drop it into the root of your SvelteKit project folder.
📁 Folder Structure
🤖 Your First AI Prompt
Now it's time to let AI help you turn that static HTML into a proper SvelteKit site.
In Cursor (or with GitHub Copilot in VS Code), activate Agent mode and include generated.html in the context. Then use this prompt:
- Break the page into separate components: header, footer, hero, and other sections.
- Convert all JavaScript to TypeScript.
- Ensure components are reusable.
- Create at least one additional page (e.g., About) using the same design system.
AI-Powered Migration to SvelteKit
Let AI generate and organize the code for you. You should see results like:
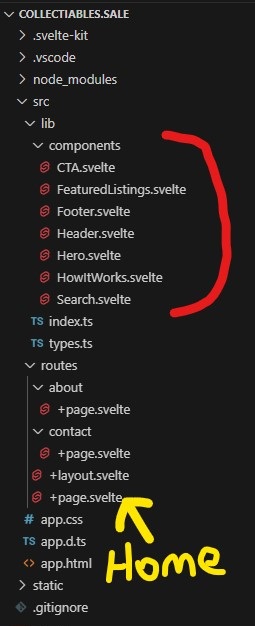
- A structured project with
src/routes/+page.svelte(your homepage) - An About page at
src/routes/about/+page.svelte - Reusable components in
src/lib/components/ - All JavaScript converted to TypeScript
✨ The Magic Moment
You now have a structured, maintainable project with a home page, an about page, and reusable components — making it easy for AI (and you) to expand further.
Extending Your Site with AI
From here, you can prompt AI with simple requests like:
And it will follow the same structure, styles, and components you've already established.
🎯 Best Practices for AI-Assisted Coding
Based on my experience building MiniBreaks.io, here are key practices that will save you time and frustration:
Be Specific with Context
Always include relevant files in your AI context. The more context AI has about your existing code structure, the better it can maintain consistency.
Break Down Complex Tasks
Instead of asking AI to build an entire feature, break it into smaller components. Ask for one component at a time, then integrate them.
Iterate and Refine
Don't expect perfection on the first try. Use follow-up prompts to refine styling, improve accessibility, or add missing functionality. (we will expand on this in the later parts)
⚠️ Common Pitfall
Don't try to build everything at once. AI works best when you give it focused, specific tasks. Think of it as having a very capable junior developer who needs clear instructions.
📝 Homework
Before moving to Part 7, complete these steps to establish your development foundation:
npm run dev) and explore the result!🎯 Success Criteria
By the end of this exercise, you should have a working SvelteKit application that you can view in your browser, with your design properly componentized and at least two pages (Home and About).
🚀 What's Next
Congratulations! You've successfully transformed a static design into a dynamic web application using AI assistance.
In Part 7, we'll take your website to the next level by adding advanced features:
- User authentication and login systems
- Email functionality for notifications and communication
- Database integration for data persistence
- Step-by-step instructions for wiring these features to your UI
🔧 Coming up: We'll explore how AI can help you implement complex features like user accounts, email systems, and databases with practical examples and real code you can use in your project.